Configuring your Workflows
Workflows are a feature within Kinabase collections that allow you to create custom process stages that align with your business's internal processes through which individual records can be progressed. This allows you to quickly visualise task status, and to easily track which items are ahead, behind, or on-track.
Please see the video below that talks you through setting up a Workflow, using the example of an Expenses approval process.
Or alternatively follow these instructions below:
Create a Workflow Stage
- Find the relevant collection and navigate to the Configuration Panel, by clicking the Options menu (⋯) in the top right of the window, then selecting the Configure menu.
- Select the Workflow tab on the left-hand side, and click the toggle switch to turn on Workflows.
- Click the button to Add Stage, then name and optionally select a colour to represent the stage.
If your business process requires multiple Stages, this can be achieved by repeating the steps above.
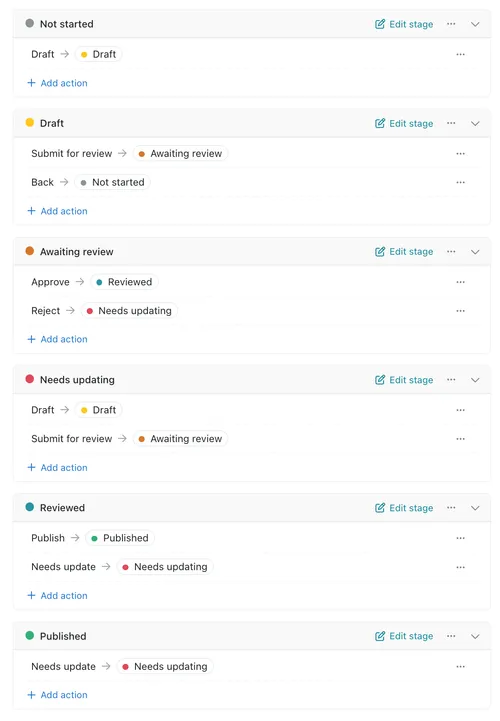
Linking Stages With Actions
Once you've created a few stages you can set the process flow by adding linking actions. Actions are buttons that display in the header of the record details pane, when clicked, the record can be moved forwards or backwards to different stages in the process in whichever order you choose.
- To create stage actions, first open the Workflow configuration window as before.
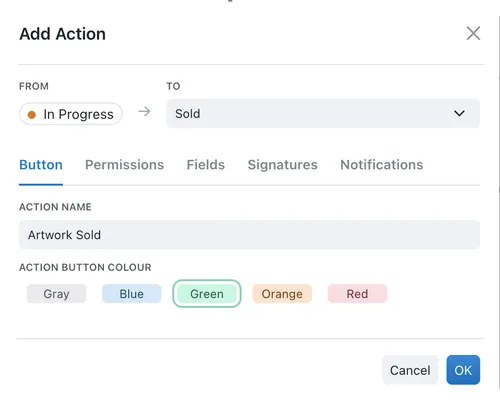
- Within each stage there is the option to Add Action, this takes you to the action creation window.
- Here, select the stage that you wish to follow the current stage when the action button is pressed.
- Name the action and select a colour for the action button, then click Ok to create the action.
If one stage needs to progress to multiple other stages, this can be achieved by repeating the steps above to create multiple actions, each progressing the record onto a different stage.
Set the Stage's Permissions
For some business processes it is necessary to limit who can progress a record - such as approving an expense. In this case, you can set exactly who is able to trigger or approve an action within a workflow.

To set Permissions for a Workflow:
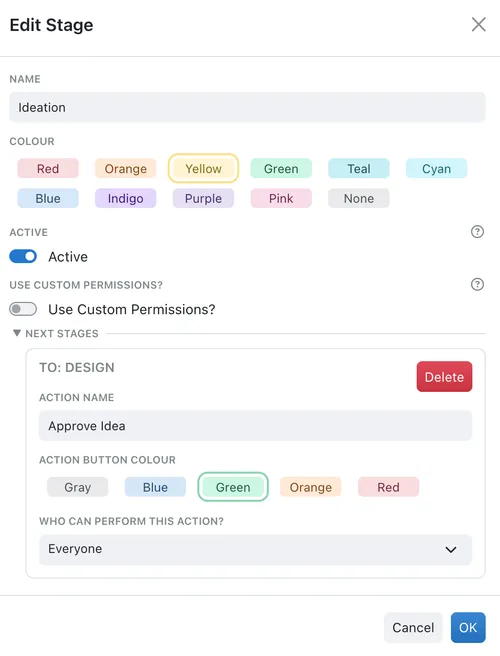
- Open the Workflow configuration window as before.
- Click the Options menu (⋯) on the right of the relevant stage(s), and click Edit.
- In the 'Next Stages' dialogue there is a prompt "Who can perform this action?"
- Select from the following: Everyone, Role-Specific, Person-Specific, Nobody
- Now select the relevant role(s) or person (people) that you want to give permission for this action.
Additional Fields on Action
If you want to collect additional information from completed actions, you can create a new field that must be populated by your users when they complete a specific action. When completing the action your users will be prompted to provide a value, description or to select options to add to the record before that record can be progressed to the next stage.
To create an additional field on an action:
- Navigate to the workflow configuration window
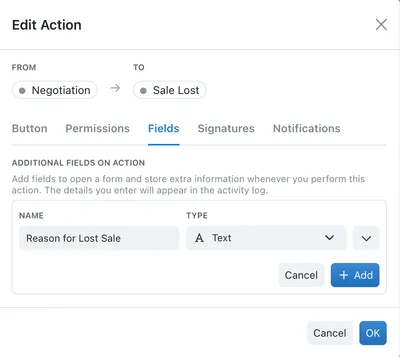
- Select the options window (⋯) to the right of the workflow action you wish to enable signatures for, and select Edit Action
- Select the Fields tab, and click the Add Field button
- Enter a name and entry type for the new field and click the Add button, then OK to save changes

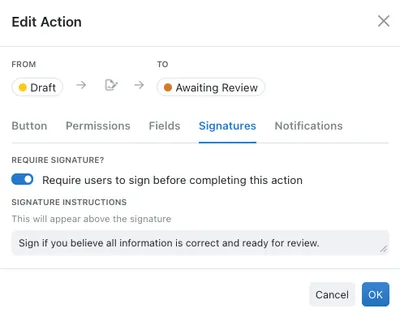
Require a Signature for Stage Progression
Add an additional level of accountability and control to your workflows by requiring individuals to provide a signature to progress a record through specific stages of your workflows.
To enable signatures:
- Navigate to the workflow configuration window
- Select the options window (⋯) to the right of the workflow action you wish to enable signatures for, and select Edit Action
- Select the Signatures tab, and click the toggle for "Require users to sign before completing this action"
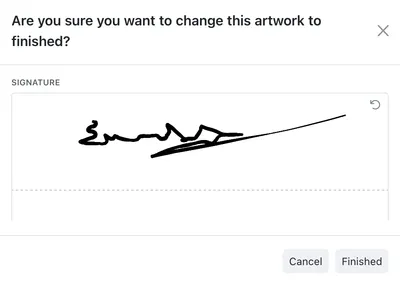
Now whenever a user tries to progress this record with an action that requires a signature, they will be prompted to draw their signature as pictured. This signature is stored within the activities tab with a time-stamp for when it was signed.
Set a Workflow Stage as Inactive
You may want to be set workflow stages as inactive - this will filter out those records by default when viewing the collection.
- Navigate to the relevant collection
- Click the Options menu (⋯) to configure the collection
- Click on the Workflow tab
- Find the Stage(s) you want to make inactive
- Click the Options menu (⋯) to the right-hand side and select Edit

- This brings up the 'Edit Stage' dialog
- Click the toggle button under Record Status to show or hide the stage from your collection
- Click OK to finalise the change
Example of Workflows in Action
In this example, an online publisher is tracking the status and publishing of articles to it's website. Individual articles are tracked from idea inception, in progress, drafting, approval, and publishing.