Import Your Data
By importing your data into Kinabase you will be able to add records quickly and efficiently, saving your team time to be doing other things. This is great if you're just getting started with Kinabase and moving data from a spreadsheet or different system.
Quick steps: Importing Data
- Prepare your CSV file - it needs a column for each field you want to import and a column heading.
- Click on the Collection in the Sidebar.
- From the options menu, select the Import (.csv) menu item.
- Select the CSV file from the file location that it was saved in.
- Map the column names on your imported file to the fields you have set up for your Collection.
- Press Next to import the data.
Preparing the CSV file
Many applications allow you to export data into this spreadsheet format, which can be opened by applications like MS Excel. To do this you need to make sure:
- The file is saved as a Comma-separated Values (CSV) file in a location where you can find it.
- Each column in the CSV should match one of the fields that you have set up in the Collection.
- Use the first row of the spreadsheet to give each column a meaningful title. This will be used later to ensure the correct information is imported.
- The data in each of the columns contains the correct format, so that it matches the field type that was set up in the Collection. This means number fields must contain only numbers, and date fields must be only properly formatted dates.
Importing the CSV file
Once prepared, you can import your file by navigating to the relevant Collection, such as Suppliers in the example below, and importing the data by selecting the Import (.csv) option from the menu.
Select the Import option from the Collection
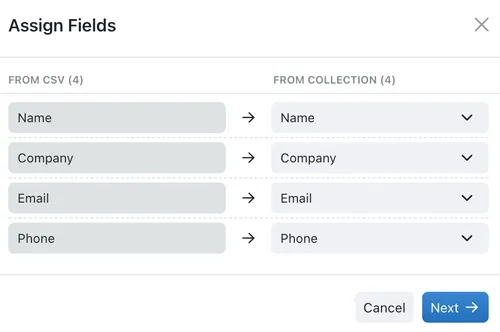
On the next step, you can tell Kinabase how to allocate the columns on your imported file, to the fields that you have set up in your Collection. Use the dropdown on the right hand side to select the correct Kinabase field, or you can leave it on Ignore if you do not want to import that column of data.
Assign each CSV column to a Kinabase field
When you click Next your records will be automatically imported and you will receive a confirmation message on your screen. Your data is now available in Kinabase for your team.
If the import fails
To review which records failed to import, you can download the CSV file containing only those records. This file can then be re-imported once corrections have been made. Make sure the "include error column" toggle is active so that the error messages can be seen against each individual activity in your CSV file.
If you are still struggling please reach out to our support line and raise a support ticket.
Importing Activities
Admins can now import activities into Kinabase from older systems, meaning that you can smoothly transition onto Kinabase whilst retaining full traceability.
Please note in order to import past activities you need to be an administrator and have a Comma Separate Variables [.csv] file prepared for your activities. See below for how this CSV file needs to be formatted.
- Navigate to Settings by clicking your name in the bottom left-hand side of the menu.
- Select the Import/Export tab, found under the System heading
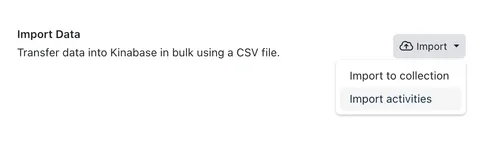
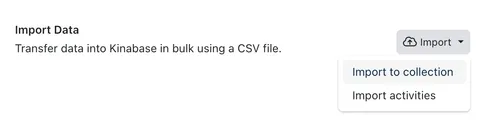
- Use the drop-down next to Import Data and choose Import activities
- Drag your CSV file into the pop-up dialog, or click to navigate & select your file.
- A dialog appears for you to assign the fields of your CSV file with the Kinabase activity fields
- Click next
Congratulations, your past activities have now been logged on the appropriate records.
CSV Preparation
Your CSV file of activities needs to be in the format below. Any fields that are in bold are required.
| Field | Description |
|---|---|
| Linked Collection | The collection the Activity is associated with |
| Linked Record | The record the Activity is associated with |
| Activity Content | The content or description of the note/email/phone call/meeting |
| Activity Type | This needs to be one of: Note, Email, Phone Call, Meeting |
| Created By | Employee who created the activity |
| Created At | Date and time when the activity was created |
| Updated At | Date and time when the activity was last updated |