Getting Started
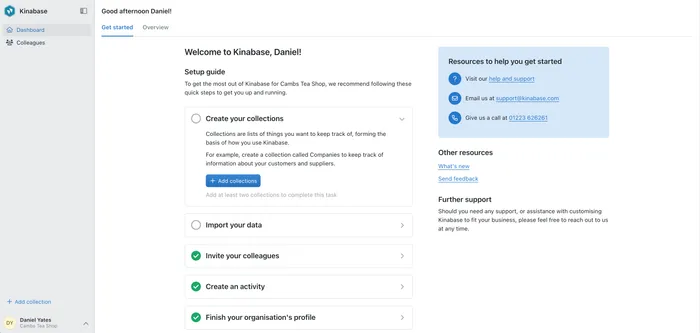
When you first log into Kinabase, this is the very first screen you will see.

From here you can navigate through a variety of features, including creating a record and adding activities. Open each panel by clicking on the corresponding side arrow towards the middle of the screen, which will then present you with detailed instructions.
Explore Kinabase
When you open up this option, you will get an overview of your Kinabase. This will explain how your administrator has set up Kinabase for tracking whatever it is you need to do.
If you click the side arrow on the create a record option, you will be able to read instructions on how to create your first record.
Create a Record
Creating a record manually
- From the left-hand navigation panel on your screen, select the relevant collection.
- Left click on the collection and this will then open up on the main screen.
- Click on the Add button to the top right of the main screen.

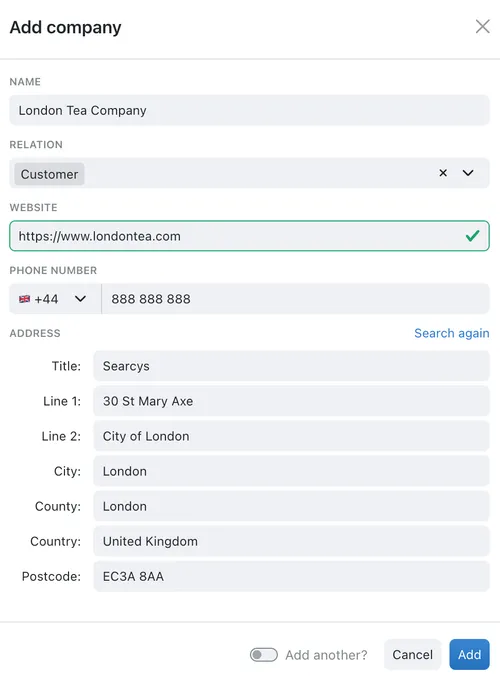
- Click into the Name box and type your first record.
- If you have more than one record, you can click on the button next to Add another? This means when you click Add to confirm your record, another record box will pop up so you can input the next record straight away.
Importing records
- From the left-hand navigation panel on your screen, select the relevant collection.
- Click on the Options menu (⋯), found between the Add button and Search box.
- Upload your CSV file by dragging and dropping it or selecting the file.
- Use the drop down menu on the right hand side to select the Kinabase field to map your CSV's headers to. Or, click Ignore if you do not want to import any data into that column.
- Click Next and your file will be imported.
- You should then receive a confirmation message on the screen.
- You have imported your first record!
Find out more about importing data
Create an Activity
An activity tracks things that have happened. You may not want these on all your collections, so Kinabase gives you the option to add in activities to the collections that need them. To do this:
- From the Sidebar, select the Collection that contains the record to which you want to add an activity.
- Choose the record that you want to add an activity to from the list that is shown.
- Select the Activities tab. If the tab isn't present then this collection does not support activities. Speak to your administrator to see if they can be enabled.
- Select the type of activity that you want to record. The list is managed by your administrator and should contain relevant actions.
- Enter the content. This can be any text and could be a short note, copy of an email or key bullet points from a meeting.
- Optionally, use the change date button (with a calendar and clock icon) to select when you want to timestamp the activity. This defaults to now, but can be changed to any time that reflects the activity you are entering.
- Click the Add button to add the new Activity.
For further information on creating activities, see our Manage Activities article.