Advanced Importing and Exporting
The ability to Import and Export Records, Activities, Tasks, and Data Structures from Kinabase allows you and your colleagues to quickly load in templates, create backups, and extract data into other tools such as Excel or Google Sheets.
This article will explain how to access the Import / Export page in Kinabase, how to set permissions for who can and cannot Import and Export information, and will show you how to Import and Export the following data:
- Records
- Activities
- Tasks
- Data Structure
- Headers
- All of the above, all at once
Accessing the Import / Export Page
The Import / Export page allows you to quickly Import or Export your data directly from any of the collections within your Kinabase envrionment. You can find this page by selecting Settings in the bottom left of your screen, then selecting the Import / Export pane at the bottom of the list.
Note that this page is only visible to users that are given System Admin permissions, see Managing Colleagues.

The Import dropdown gives options for the following actions:
- Records - Import new Records or update existing Records from a .csv file
- Activities - Import Activities from a .csv file
- Tasks - Import Tasks from a .csv file
- Data Structures - Import complete Data Structures from a .kinabase file
The Export dropdown gives options for the following actions:
- Everything - Export your entire Kinabase environment into a .zip file that contains .kinabase and .csv files
- Records - Export Records into a .csv file
- Activities - Export Activities into a .csv file
- Tasks - Export Tasks into a .csv file
- Data Structures - Export complete Data Structures into a .kinabase file
- Headers Only - Export only the header row from a collection into a .csv file
Each of these functions will be explained in greater deail throughout this support article.
Setting Permissions for Importing and Exporting Data
By default, new users will not have access to the Import / Export page, and will hence only be able to import and export records directly from collections, see Importing Data, and the Exporting Records section of this page.
To enable advanced Importing and Exporting permissions for your colleagues, use an admin account to enable System Admin for the colleague you wish to have access, see Managing Colleagues.
Importing and Exporting Records
When you come to set up a new Kinabase environment, create a new collection, or populate your existing collections from an external data source, it can be time-consuming and repetitive to recreate all of your existing data by manually creating new records - see Managing Records. The ability to import your data directly into Kinabase from a .csv (Comma-Separated Values) spreadsheet file can make this an instantaneous process.
Similarly, the ability to quickly export your data from Kinabase into a .csv file can be helpful if you wish to create a backup. This section will describe how you can import and export your data into and out of Kinabase with .csv files.
Importing Records
There are two approaches to importing records from a .csv file, you can either do this via the Import / Export page in the Settings menu, or you can import your data directy through the collection screen.
Before Importing your data from a .csv file, you must first prepare the file for import. Details on exactly how to prepare a .csv file can be found here: Importing Data.
Now that your .csv file is prepared, import the data into one of your collections via the Import / Export page by following these steps:
- Navigate to the Import / Export page by selecting Settings in the bottom left of your screen, then selecting the Import / Export pane at the bottom of the list of Settings pages
- Select Records from the Import dropdown menu, then select the collection that you wish to import your .csv file into
- Select the file you wish to import from your computers file directory or drag the file into the import window
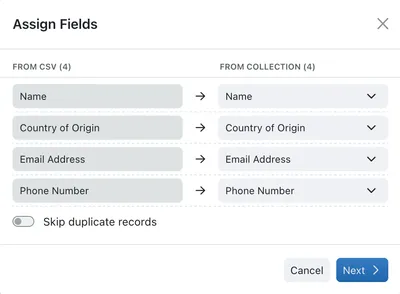
- Map the column names on your imported file to the fields you have set up for your Collection
- Optionally, select Skip Duplicate Records to prevent importing rows from the .csv file that already appear in this collection
- Press Next to import the data


Importing Updates to Existing Records
Selecting Only Update Existing Records allows you to exclusively update the records that already exist within your targeted collection from a .csv file. This is useful if you want to bulk edit a large number of records from a spreadsheet file that already containts the required changes.
Once a file is selected, choose a common field between the existing collection and the new .csv file. Click Next and follow the same steps as you would for importing records from a .csv file.

Exporting Records to a CSV File
There are two approaches to exporting records to a .csv file, you can either do this via the Import / Export page in the Settings menu, or you can import your data directly through the collection screen.
These steps will describe how to export the records from a collection to a .csv file via the Import / Export page:
- Navigate to the Import / Export page by selecting Settings in the bottom left of your screen, then selecting the Import / Export pane at the bottom of the list of Settings pages
- Select Records from the Export dropdown menu, then select the collection that you wish to export to a .csv file
- Name your file, and choose where to save the file to in your computer's directory
- Click Save to complete the export, your exported .csv file will now appear in your computer's directory

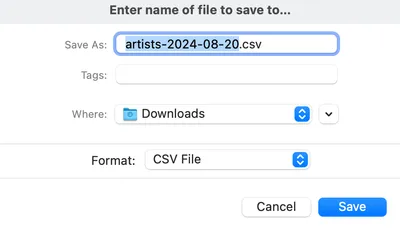
The exported .csv file can be opened in any spreadsheet application that can read .csv files (Excel, Google Sheets, etc.).
Importing and Exporting Activity Data
Activity Logs are stored within specific records and document changes made to that record, the completion of Tasks, as well as manually added Emails, Notes, Meetings, and Phone Calls. The ability to Import and Export Activity logs can be valuable for keeping offline records of what your users have done, allowing editing and re-importing activities, and importing data from legacy systems.

Importing Activities
Administrators can import activities into Kinabase, meaning that you can smoothly transition onto Kinabase whilst keeping a full history of what has happened alongside each of your records.
Note that the .csv file that contains Activity data must be formatted correctly, with the right column headers and data in the required fields. The following guide shows which columns must be present, column titles in bold are required:
- Linked Collection - The collection the Activity is associated with
- Linked Record - The record the Activity is associated with
- Activity Content - The content or description of the note/email/phone call/meeting
- Activity Type - This needs to be one of: Note, Email, Phone Call, Meeting
- Created By - Employee who created the activity
- Created At - Date and time when the activity was created
- Updated At - Date and time when the activity was last updated
Now that your .csv file has been prepared, the following steps will describe how to import your data into Kinabases:
- Navigate to the Import / Export page by selecting Settings in the bottom left of your screen, then selecting the Import / Export pane at the bottom of the list of Settings pages
- Select Activities from the Import dropdown menu, then select the .csv file that contains the activities that you want to import
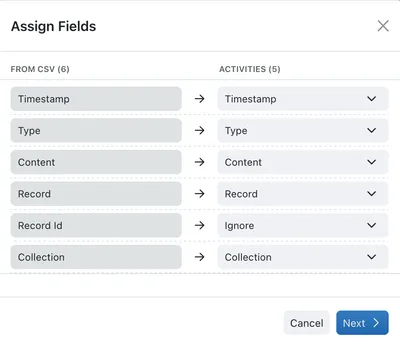
- A dialog box will appear asking for you to assign the fields of your CSV file with the Kinabase activity fields
- Click Next - your activity data will have now been imported and saved!

Exporting Activities
These steps will describe how to export Kinabase Activity data into a .csv file via the Import / Export page:
- Navigate to the Import / Export page by selecting Settings in the bottom left of your screen, then selecting the Import / Export pane at the bottom of the list of Settings pages
- Select Activities from the Export dropdown menu, then select the collection that you wish to export to a .csv file
- Name your file, and choose where to save the file to in your computer's directory
- Click Save to complete the export, your exported .csv file will now appear in your computer's directory
The exported .csv file can be opened in any spreadsheet application that can read .csv files (Excel, Google Sheets, etc.).


Importing and Exporting Task Data
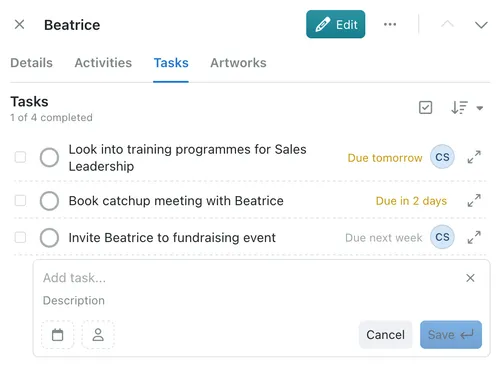
Tasks are assigned against specific records and carry information on the task owner, scheduled start date, and completion date. The ability to Import and Export Tasks can be valuable for keeping offline records, allowing editing and re-importing of tasks, and for importing data from legacy systems.
Importing Tasks
System admins can now import Tasks into Kinabase from older systems, meaning that you can smoothly transition onto Kinabase whilst retaining full traceability of your Tasks.
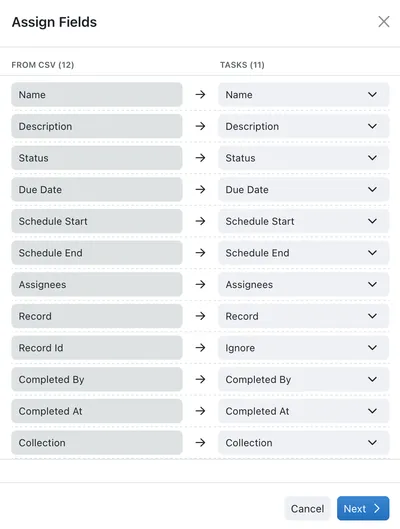
Please note that the .csv file that contains Task date must be formatted correctly. Within your activities .csv file, you must have columns that describe the following: (column titles in bold are required)
- Task Name - The title of the task
- Task Description - A longer description of the task
- Task Status - Either "Not Started" or "Completed"
- Due Date - The deadline date that the task must be completed by
- Scheduled Start - The scheduled start time for the action
- Scheduled End - The scheduled end time for the action
- Assignees - The colleagues that the task has been assigned to
- Linked Record - The record the Task is associated with
- Record ID - The ID of the record the Task is associated with
- Completed By - Which user completed the action?
- Completed At - Date of task completion
- Linked Collection - The collection the Task is associated with
Now that your .csv file is formatted correctly, the following steps will describe how to import your Task data:
- Navigate to the Import / Export page by selecting Settings in the bottom left of your screen, then selecting the Import / Export pane at the bottom of the list of Settings pages
- Select Tasks from the Import dropdown menu, then select the .csv file that contains the task data that you want to import
- A dialog box will appear asking for you to assign the fields of your CSV file with the Kinabase task fields
- Click Next, your task data has now been imported and saved!

Exporting Tasks
Exporting task data from Kinabase allows you to create back-ups, perform more advanced analytics in Excel, or modify tasks in bulk to be re-imported into Kinabase at a later date.
These steps will describe how to export Kinabase Task data into a .csv file via the Import / Export page:
- Navigate to the Import / Export page by selecting Settings in the bottom left of your screen, then selecting the Import / Export pane at the bottom of the list of Settings pages
- Select Tasks from the Export dropdown menu, then select the collection that you wish to export to a .csv file
- Name your file, and choose where to save the file to in your computer's directory
- Click Save to complete the export, your exported .csv file will now appear in your computer's directory
The exported .csv file can be opened in any spreadsheet application that can read .csv files (Excel, Google Sheets, etc.).


Importing and Exporting Data Structures as .kinabase Files
Data Structures can be thought of as the framework of your Kinabase system, defining what data is held in Collections and corresponding workflows. A Kinabase Data Structure contains field name, data type, and computed field logic information relating to a specific collection. The ability to import and export Data Structures allows you to make backups of your system set up, or download and import pre-existing structures.
Importing Kinabase Data Structures
To import a Kinabase Data Structure, you must first have a .kinabase file either exported from your own Kinabase environment, or provided by one of our support engineers.
To import a Data Structure, follow these steps:
- Navigate to the Import / Export page by selecting Settings in the bottom left of your screen, then selecting the Import / Export pane at the bottom of the list of Settings pages
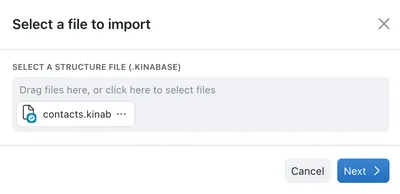
- Select Data Structures from the Import dropdown menu, then select the .kinabase file that you want to import
- Click Next, and a collection will be created matching the imported template.

Exporting Kinabase Data Structures
To export a Kinabase Data Structure as a .kinabase file from the Import / Export page, follow these steps:
- Navigate to the Import / Export page by selecting Settings in the bottom left of your screen, then selecting the Import / Export pane at the bottom of the list of Settings pages
- Select Data Structure from the Export dropdown menu, then select the collection that you wish to export to a .kinabase file
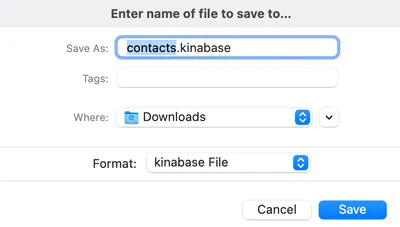
- Name your file, and choose where to save the file to in your computer's directory
- Click Save to complete the export, your exported .kinabase file will now appear in your computer's directory

Exporting Headers as .csv Files
Headers represent the names of the fields within a collection - the ability to export headers to a .csv file will allow you to quickly create datasets in Excel or Google Sheets to later be imported into Kinabase.
To export a Kinabase Headers as a .csv file from the Import / Export page, follow these steps:
- Navigate to the Import / Export page by selecting Settings in the bottom left of your screen, then selecting the Import / Export pane at the bottom of the list of Settings pages
- Select Headers from the Export dropdown menu, then select the collection that you wish to export to a .csv file
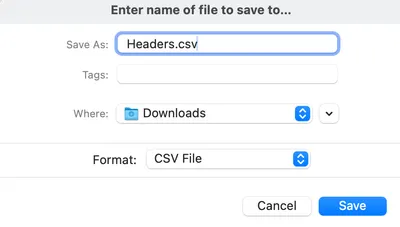
- Name your file, and choose where to save the file to in your computer's directory
- Click Save to complete the export, your exported .csv file will now appear in your computer's directory

Exporting Everything from your Kinabase Environment
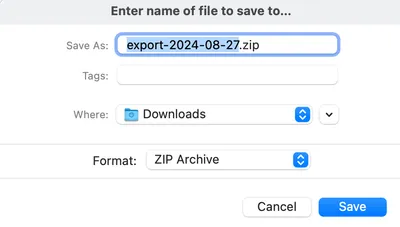
In addition to all of the above functionality, there is another option to export everything in your Kinabase environment into a single .zip file. This .zip file contains .csv and .kinabase files that describe your environment. This allows you to create a full backup of your entire Kinabase environment, or to migrate your organisation into an entirely new environment.
To export everything in your Kinabase environment as a .zip file from the Import / Export page, follow these steps:
- Navigate to the Import / Export page by selecting Settings in the bottom left of your screen, then selecting the Import / Export pane at the bottom of the list of Settings pages
- Select Export Everything from the Export dropdown menu, then select Export
- Name your file, and choose where to save the file to in your computer's directory
- Click Save to complete the export, your exported .zip file will now appear in your computer's directory

