Turning on the Files Tab
Attach files to records
The Files Tab in Kinabase lets you attach documents, images, or other files directly to records
You can use Kinabase's built-in file storage
To learn more about connecting your Kinabase account to Microsoft 365, check out the Microsoft 365 Integration guide.
1. Enable Files for a Collection
1. Open Collection CollectionA list of records in Kinabase, similar to a table in a spreadsheet or database. Configuration
- Go the the collection in your sidebar.
- Click the ⋯ (options menu) at the top right, or right-click the collection name.
- Select Configure from the dropdown.
2. Go to the 'Files' Tab
- In the configuration panel, locate the Files section (under 'Features').
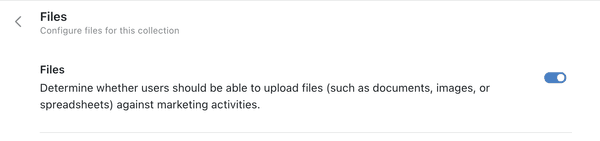
3. Toggle 'Files' On
- Switch on the Files feature for this collection.
A Files tab will appear inside each record, letting you view
View, upload, rename, or delete attached files.A customised display of Records in a Collection, defined by filters, sorting, grouping, and visible Fields.
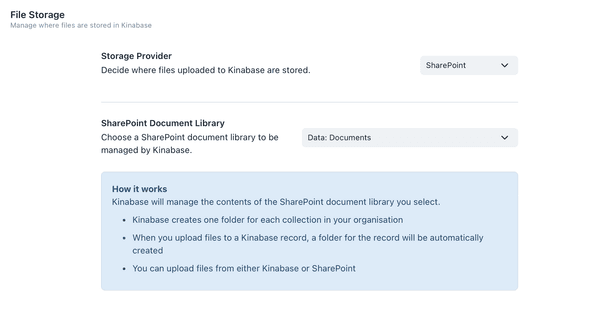
2. Choose a File Storage Method
By default, Kinabase uses built-in storage for files, with a 5 MB file-size limit. If your organisation prefers SharePoint (for larger files or integrated file management), follow these steps:
Connect Microsoft 365
In Settings → File Storage, link your Microsoft 365 account (requires System Admin approval).Select 'SharePoint'
Under Storage Provider, pick SharePoint and choose the document library you want to use.Update the Collection
Return to your collection's Files tab to confirm it's set to use SharePoint.
SharePoint's file size limits differ from Kinabase's built-in storage. This can be helpful if you deal with large, image-heavy files.
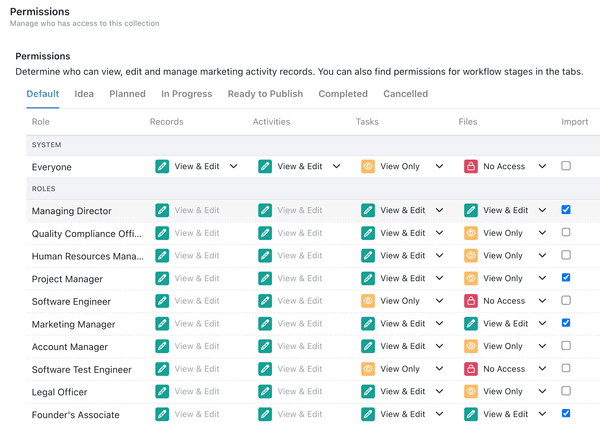
3. Adjust Permissions (If Needed)
Decide who can view, upload, or delete files in this collection.
If some users only need read-only access to files, set their Role
You can read more about setting up permissions here.
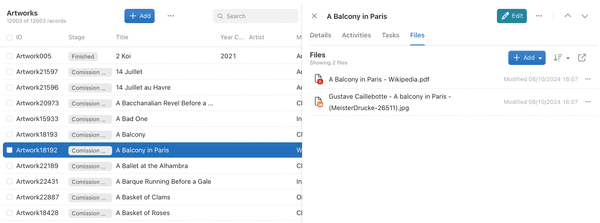
4. Adding and Managing Files
Once the Files tab is activated:
- Open a Record in your collection and click the Files tab.
- Upload a File via drag-and-drop, a file explorer dialog, or creating a new Office document (if using SharePoint).
- View, Rename, or Delete existing files by clicking the ⋯ next to each file.
When using SharePoint, double-clicking a file opens it in your SharePoint web interface. Deleting a record will move its associated files to the 'Deleted' folder in SharePoint.
5. FAQs
By turning on the Files tab and choosing the right storage method (built-in or SharePoint), your team can keep all relevant documents close at hand, making collaboration simpler and record management more effective.
Need more guidance? Explore the rest of our Help & Support, or email us at support@kinabase.com.