Types
Organise records into subtypes
A Type is a subtype or category within a collection
By grouping records
Why use types?
- Users only see the fields that matter for the subtype they are creating.
- No need to maintain multiple collections if they share most of their fields — simply use Types instead.
- Each Type can have unique rules, validation, or even permissions Permissionwhile still living in the same collection.A specific right to view, edit, delete, or administer parts of Kinabase, granted via Roles.
- Colour and icon badges let you visually distinguish types in tables, lists, and configuration screens.
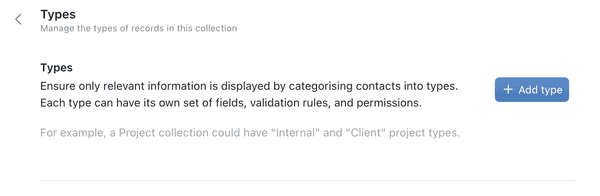
Accessing the types configuration
- Go to the collection in the sidebar.
- Right-click or click the ... menu and choose Configure.
- Select the Types tab. This shows any existing types and lets you add, remove, or edit them.
Creating or editing a type
- Click Add type to create a new type, or click the Edit button on an existing type.
- Select a colour from the dropdown palette on the left of the type name. Choose from 10 colour variants including blue, green, red, orange, purple, and more.
- Click the icon picker next to the colour selector and search for an icon that represents the type. The picker suggests icons based on the type name to speed things up.
- Give the type a name (e.g., 'Client Project', 'Internal Project', or 'Resistor', 'Capacitor').
- Check or uncheck which fields belong to this type. Any field marked required in the collection's Fields tab will remain required across all types.
- Click Save to confirm.
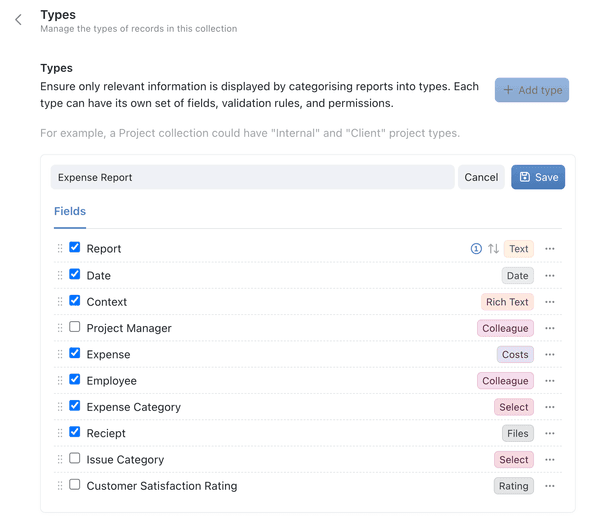
The chosen colour and icon will display as a visual badge wherever that type appears, including table views, lists, and configuration screens.
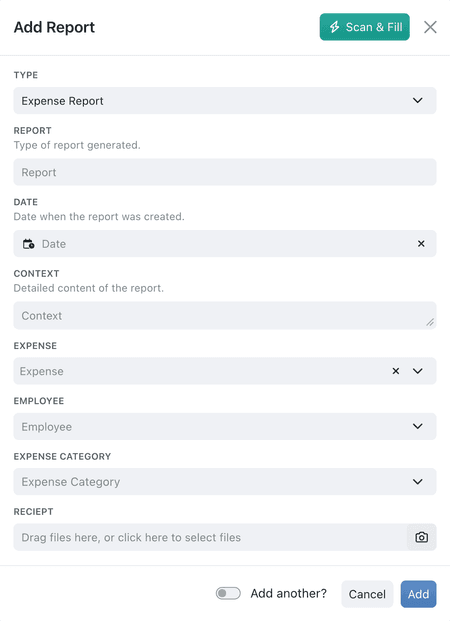
Adding a record with types
When you click + Add to create a new record in the collection:
- Select the type — a drop-down menu lets you pick from the types you created (e.g., 'Client Project' or 'Internal Project').
- Fill in the relevant fields — only the fields you assigned to that type will appear, keeping the form streamlined.
- Add the record — Kinabase stores the type choice within the record, so you always know which subtype it belongs to.
Changing a record's type
The Type lifecycle setting controls whether type changes are allowed at the collection level.
Configuring the Type lifecycle
- Go to the collection in the sidebar.
- Right-click or click the ... menu and choose Configure.
- Select the Types tab.
- Below your list of types, find the Type lifecycle setting.
- Choose Fixed to keep types permanent, or Flexible to allow type changes.
- Click Update to save your choice.
Changing a record's type
When the Type lifecycle is set to Flexible:
- Open an existing record and click Edit.
- The type selector appears in the editor window. Choose a new type.
- If any fields would lose data, an inline confirmation lists the affected fields along with a warning that the change cannot be undone.
- Click Change type to proceed, or Go back to cancel.
The same confirmation flow applies when editing multiple records at once.
Best practices
- Start with a core set of fields that apply to all records. Then add type-specific fields to keep subtypes organised.
- Review required fields — if a field is required at the collection level, it remains mandatory for every type.
- Use colours and icons consistently — choose a colour scheme that makes sense for your categories so team members can recognise types at a glance.
- Create views for your types — instantly create a new view for your type by using the ... menu. See Views for more detail.
- Plan for growth — add new types as your processes evolve.
By harnessing Types in Kinabase, you keep your collection flexible and tidy.
Each record subtype displays only the fields and rules that matter, making data entry straightforward for your team, by providing consistent, organised information.
Read our Collections and Views guides for more on organising your data.