Creating Views
Create views for your collection to quickly find and filter records
Views
What are Views?
Views are custom, saved configurations of filters, sorting, and display settings that let you quickly focus on the key records within your collection.
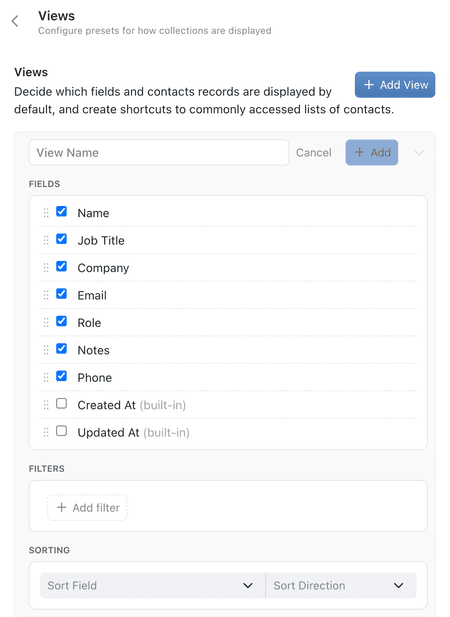
Views have a few key elements;
A quick-description that summarizes the view for your colleague(s).
An icon to help identify the view at a glance, making it clearer to find and select.
The fields in your collection that you want to display in this view. You can choose which fields are visible, and in what order.
The condition(s) with which you will filter records in the collection.
The sorting conditions and order - select the field you want to sort, and the sorting order (ascending-descending, A-Z, Oldest-Newest).
The field by which you want to group records in the collection. This allows you to quickly cluster records by a specific field - like workflow
Use these elements to ensure your team has all the relevant records when they select your View.
Creating Views
Views

Creating a New View
Open a Collection Configuration:
Click the ⋯ (options menu) in the top-right of the collection view, or right-click the collection name in the sidebar and select Configure.Go to the Views Tab:
In the configuration panel, select the Views tab.Add a New View:
Click + Add View.Customise Your View:
- Name Your View: Give it a descriptive name
(e.g., 'Overdue Checks', or 'High-Priority Projects'). - Set an icon: Give your view an icon for extra ease of use.
- Select Visible Fields: Optionally, choose which fields to display.
- Set Filters: Apply the filters you want to include.
- Sort Data: Choose a field and set your desired order
(e.g., sort by 'Due Date' in ascending order). - Group Data: Choose a field to group your records.
- Define Permissions: Set who can see your View - everyone or By Role.
- Name Your View: Give it a descriptive name
Save Your View:
Click +Add next to your new view's name.
Your new View will now be available as an option from the collection's Views menu.
Views are most powerful when you create multiple for different needs or users. If you only create one View, this will be the default. Sometimes its useful to create an 'Show All' view.
Create a View from your Types
It's often useful to have specific views for your Types to keep them organised.
Using Saved Views
Once your view is created, you can easily access it by clicking on the view icon & name at the top of the collection.
Switch Views Easily:
Access the Views menu within the collection to quickly switch between different saved views.Maintain Consistency:
Share your custom views with your team so everyone sees the same filtered data, improving collaboration.
It's a good idea to create a 'Show All' view with no filters, so you always have a way to see every record in a collection.
Best Practices
Save Frequently Used Filters as Views.
This avoids repeating the filtering process every time.Name Views Clearly.
Descriptive names help you and your team quickly identify the purpose of each view.Give Your Views an Icon.
Humans are visual creatures, use an icon for extra explanatory power.
Using search, filters, and views lets you quickly find the information you need in Kinabase - improving productivity and keeping your data organised.
If you need further assistance, our Support Hub and your System Admin are here to help.