
Invite Users & Licences
How to invite team members and understand licences
Kinabase is most useful when your whole team is in it. Inviting Colleague
Inviting a new active internal user updates your subscription - your monthly or annual billing reflects the change. See the Billing Admin Guide for how billing works.
1. Where to invite users
You can invite users from either:
- Settings → Organisation → Users, or
- The Colleagues list in your sidebar.
Both open the same invite form.
2. Invite a new user
1. Open Users or Colleagues
Go to Settings → Organisation → Users, or open your Colleagues list.
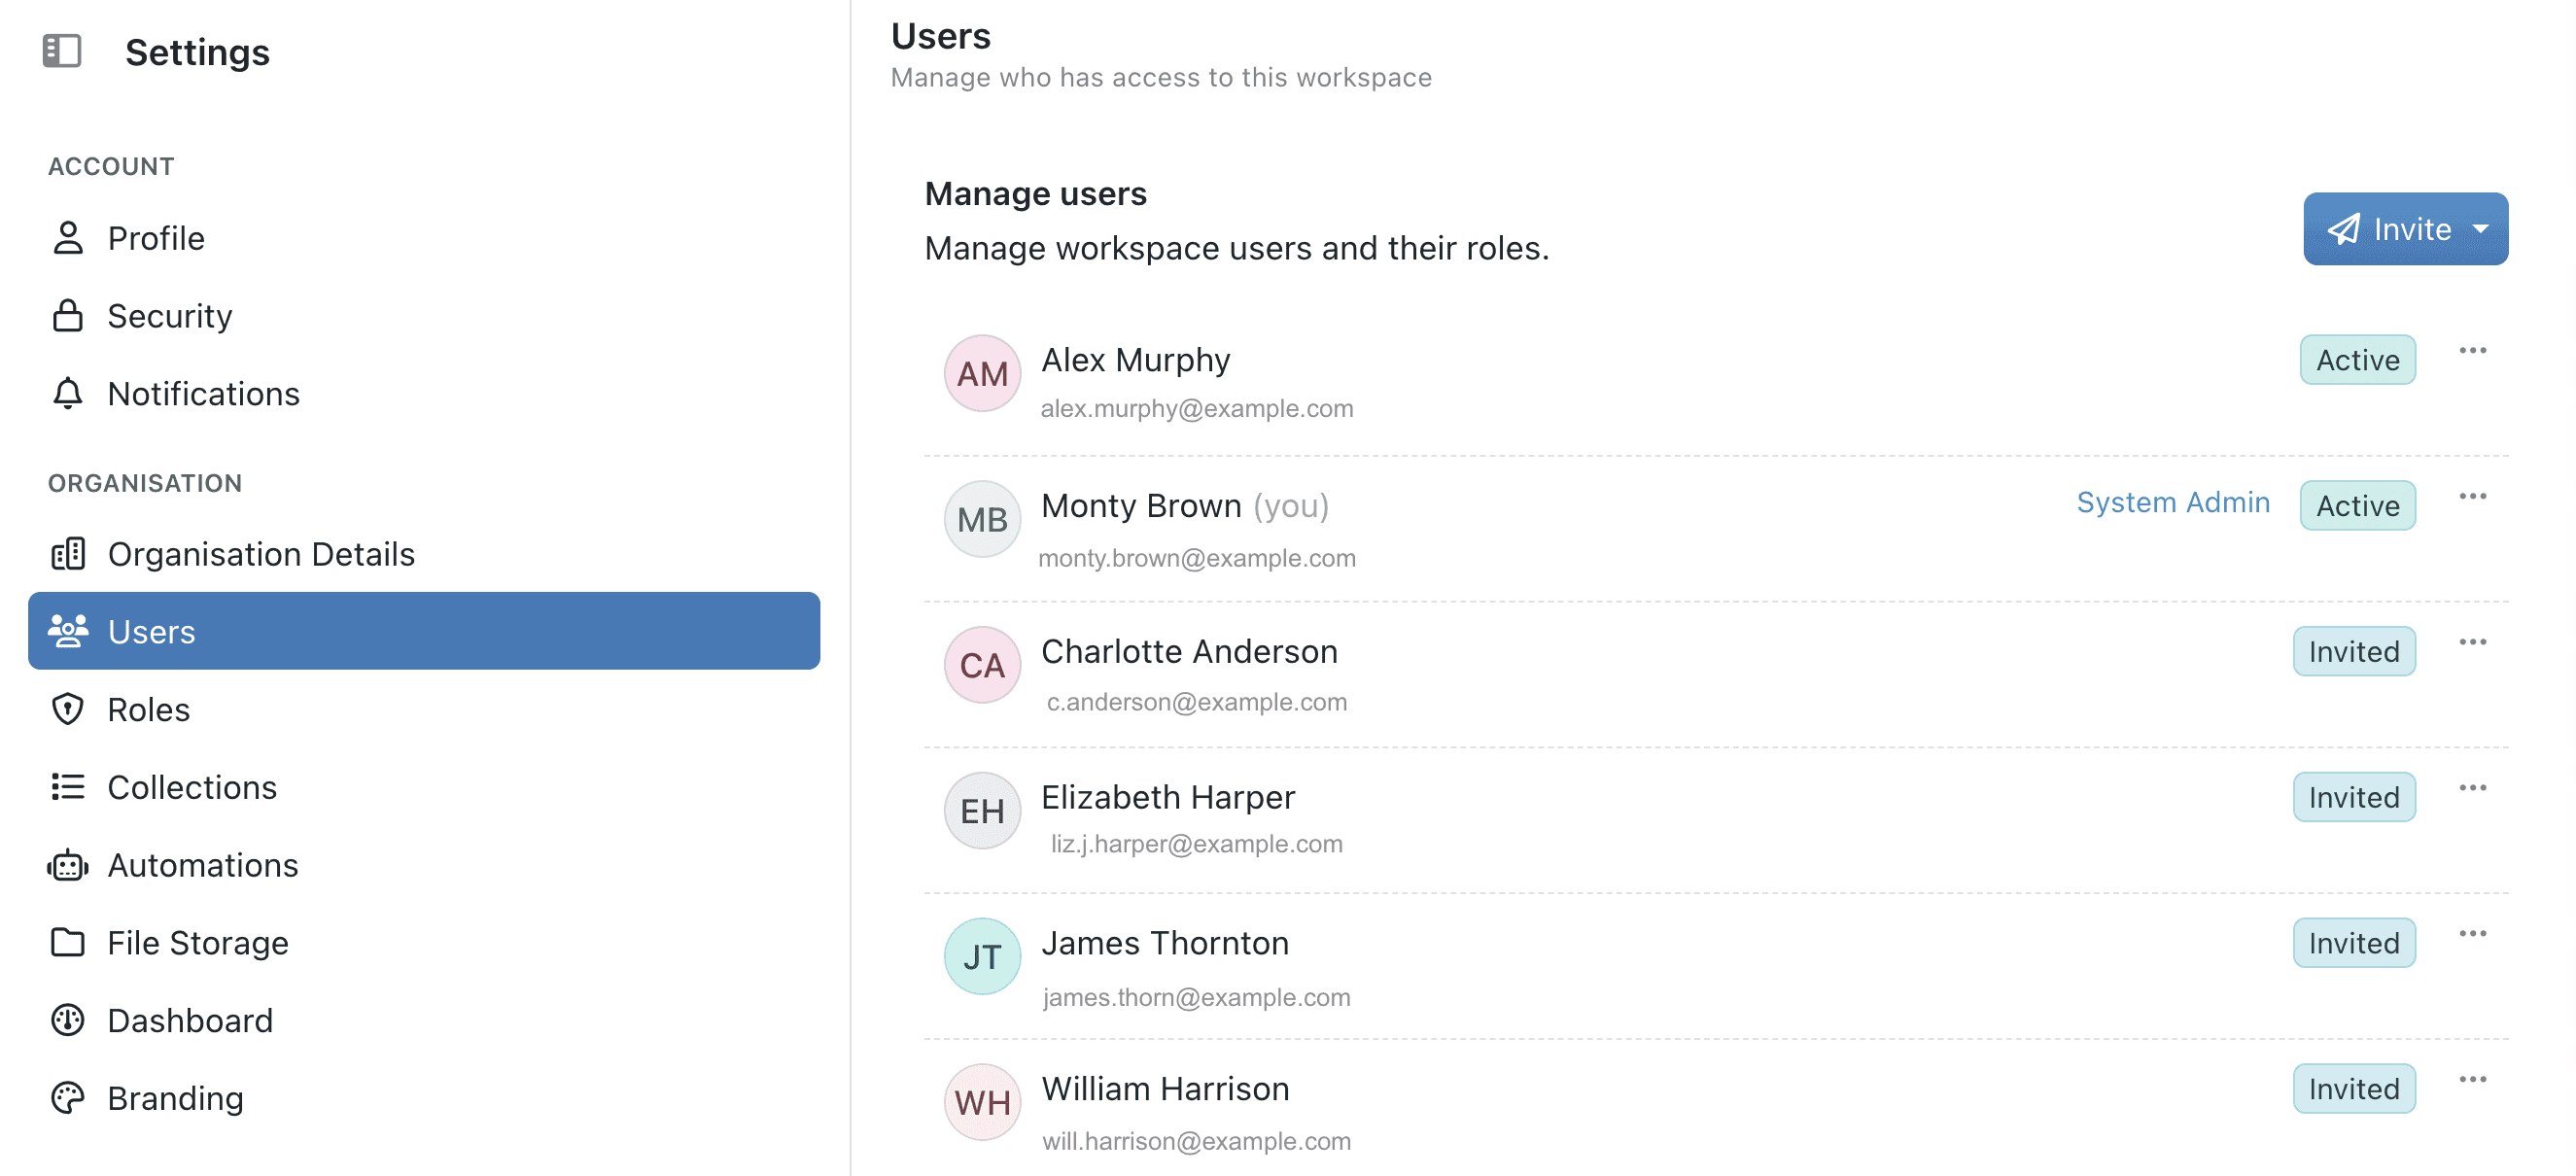
2. Click Invite
Click Invite, then select whether to invite by email or from a Microsoft 365 account.

3. Fill in their details
Enter First Name, Last Name and Email, select a User Type (see Understand User Types), and assign any Roles they need.
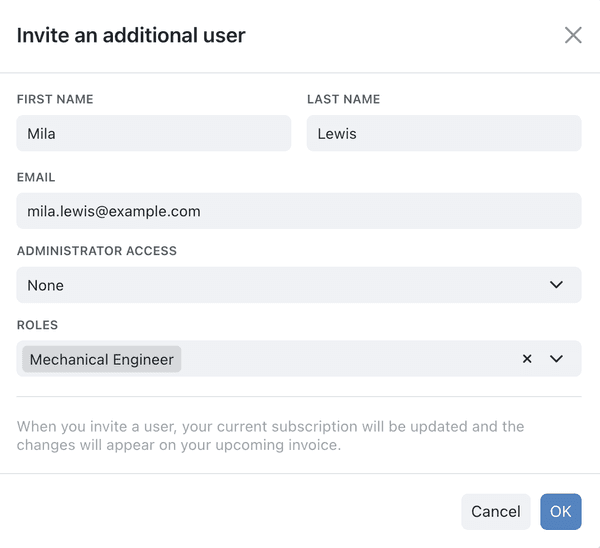
4. Send the invitation
Click Invite to send it.

To learn how to create roles first, see Assign Roles & Permissions.
The new user receives an email with a Get Started link to set up their account. That link stays valid for 24 hours. Their status changes from Invited to Active once they've registered, and they appear in both Users and Colleagues.
If they miss the window, open their row in Users and select Resend invitation.
To invite by email, Password must be enabled under Settings → System → Identity & Provisioning. If password authentication is turned off, sync users with your identity provider, or turn Password back on.
3. Licences and billing
Every active internal user counts towards your subscription. When you invite someone, you'll see a notification that your subscription will be updated to reflect the change, and it will appear on your next invoice.
If someone no longer needs access, deactivate them from Settings → Organisation → Users - this frees up their licence.
Portal users and external portal users are billed differently, as add-ons rather than per active internal user. See the Billing Admin Guide for the full picture.
Need more help? Ask your System admin, or contact our support team via Help & Support.