
Managing Your Profile
Update your name, photo and contact details
Your Profile stores your personal details - name, photo and email addresses - so colleagues recognise you across Kinabase and you never miss an important Notification
While your System admin adds you to Kinabase in the first place, you're free to keep your own profile accurate at any time.
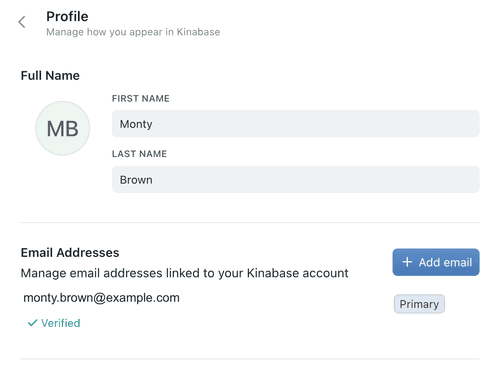
1. Opening your profile
1. Open Settings
Click your name in the bottom-left corner of Kinabase, then select Settings.
2. Go to Profile
Under the Account section, select Profile - this is where you'll find your name, photo, and linked email addresses.
2. Uploading a profile photo
Your photo displays throughout Kinabase wherever your name appears: the sidebar, the Colleagues list, Task
1. Add or change your photo
Hover over the avatar circle in Profile, click the camera icon that appears, then select an image file from your device (maximum 5 MB, any common image format). Your photo updates instantly across the application.
2. Remove your photo
Hover over your current profile photo and click the delete button that appears in the top-right corner, then confirm the removal.
3. Updating your name
In Profile, enter or update your First Name and Last Name. These details appear to other users when they view Activity
4. Managing email addresses
Kinabase lets you manage multiple email addresses from a single account - useful if you have both work and personal addresses.
1. Add a new email
Click Add Email in your Profile, then enter the new address.
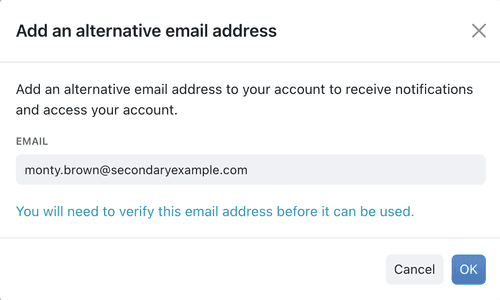
2. Verify the address
Check your inbox for a verification link and click Verify Email Address to start using the email in Kinabase. The link stays valid for 10 minutes.
3. Set a primary email
Your primary email is where Kinabase sends essential notifications - like password resets or important system alerts. Find the email you want to use, click the options menu (⋯) beside it, then select Make Primary.
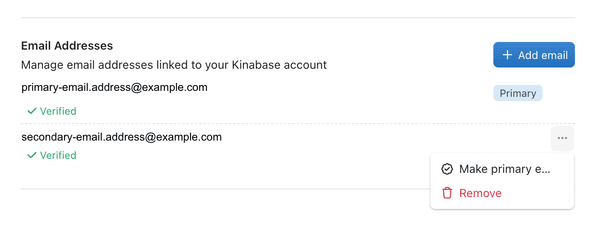
4. Remove an email
Locate the address in your Profile list, click the ⋯ menu next to it, then select Remove.
Always keep at least one verified email active so you don't miss any updates or password recovery emails.
Need more help? Ask your System admin, or contact our support team via Help & Support.